Why Disinfecting Bath Toys Is Essential
Bath toys can harbor harmful bacteria and mold. These microbes thrive in warm, moist environments like bathrooms. Kids often put toys in their mouths, increasing the risk of ingestion. Disinfecting bath toys protects your children from potential health risks. Regular cleaning prevents buildup of soap scum and dirt. A hygienic bath area keeps the overall bathroom environment safe and clean. Knowing how to sanitize bath toys is vital for your child’s health and safety.
Types of Bath Toys and Their Cleaning Challenges
Bath toys vary widely in material and design. This variety can create different cleaning challenges. Rubber ducks, plastic squirt toys, foam puzzles, and cloth dolls are common. Each requires specific cleaning methods for effective sanitization.
Rubber Ducks and Squeaky Toys
Rubber ducks and similar squeaky toys often have small holes that trap water inside. Over time, this can lead to mold growth. Closing these holes can prevent water from getting in.
Plastic Squirt Toys
Squirt toys also have holes that can harbor bacteria and mold. It’s essential to empty them after each use and let them dry thoroughly.
Foam Puzzles and Bath Mats
Foam toys and mats absorb water and soap, which makes drying them out challenging. Hang them up to dry after each bath to prevent mold.
Cloth Bath Toys
Cloth toys can absorb water and soap, too. They may require machine washing regularly to remain clean and safe.
Each type of toy might need a different approach when considering how to sanitize bath toys. Knowing these challenges helps ensure your child’s bath toys stay clean and hygienic.

Step-by-Step Guide to Cleaning Bath Toys
Ensuring your child’s bath toys are clean and safe involves a few essential steps. Follow this simple guide on how to sanitize bath toys to keep harmful bacteria and mold at bay.
- Gather the Bath Toys: Collect all the toys from the bath area. Separate them by material as different toys require different cleaning methods.
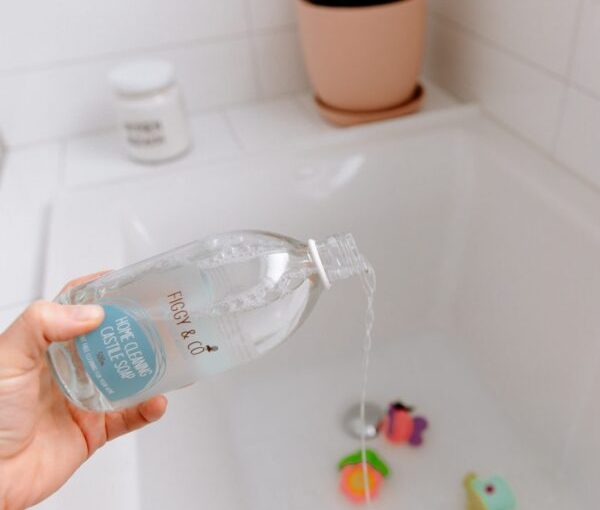
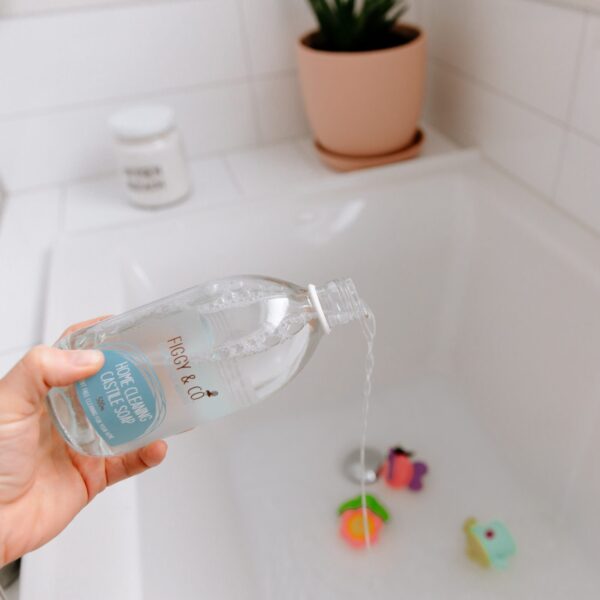
- Prepare a Cleaning Solution: Mix a sanitizing solution. You can use warm water with mild dish soap or a mixture of water and white vinegar for a natural option.
- Submerge and Soak: Submerge the toys in the solution. Let them soak for about 15 to 30 minutes. This helps to loosen any grime and kill germs.
- Scrub Away Dirt: Use a clean sponge or brush to scrub the toys. Pay special attention to crevices where mold tends to hide.
- Rinse Thoroughly: After scrubbing, rinse the toys in clean water to remove any cleaning solution residue.
- Squeeze Out Excess Water: For toys with holes, make sure to squeeze out trapped water. Rinse and squeeze several times to ensure all the cleaning solution is out.
- Dry Completely: Lay out the toys on a clean towel and allow them to air dry. Ensure they are completely dry before storing or returning to the bath.
- Inspect Regularly: Regularly check for signs of mold or damage. Dispose of any toys that cannot be fully cleaned or that show signs of breakdown.
Keeping your child’s bath toys clean doesn’t have to be a chore. Turn it into a routine that ensures their bath time is both fun and safe. Remember, the key is in regularly sanitizing, properly drying, and inspecting bath toys to maintain a hygienic play environment.
Natural Cleaning Solutions for Bath Toys
Natural solutions are great for sanitizing bath toys safely. They are gentle and often available at home. Here are some effective natural cleaners you can use.
White Vinegar
White vinegar is a powerful natural disinfectant. Mix equal parts of water and vinegar to create your cleaning solution. Soak the toys for 30 minutes, then rinse well.
Baking Soda
Baking soda cleans and deodorizes toys. Make a paste with water and apply it to the toys. Scrub gently, then rinse thoroughly.
Hydrogen Peroxide
This is a non-toxic option for disinfecting. Soak the toys in a mixture of hydrogen peroxide and water. After 30 minutes, rinse them off.
Tea Tree Oil
Tea tree oil has natural antibacterial properties. Add a few drops to warm water. Soak the toys, rinse them, and let them dry.
Remember to rinse the toys after using these solutions. Proper rinsing ensures that no residue remains. Always air dry the toys to complete the process.
Using these natural solutions helps keep your child’s bath toys clean. It avoids harsh chemicals that may harm sensitive skin. Always test on a small area if you’re not sure how the toy material will react.
When to Deep Clean vs. Regular Clean
Understanding when to perform a deep clean versus a regular clean is crucial in maintaining the hygiene of bath toys. Regular cleaning should happen after your child’s bath time. This process involves rinsing toys to remove soap and water build-up. Do this task daily to keep toys fresh and free from surface dirt.
On the other hand, a deep clean is more thorough and should occur weekly or bi-weekly. It’s especially necessary when you notice visible grime or a musty smell. Deep cleaning includes soaking the toys in a disinfectant solution, such as a mix of water and white vinegar, and scrubbing them to remove any mold or bacterial deposits.
Here are signs that it’s time to deep clean:
- The toy has not been cleaned for an extended time.
- There is visible mold or slime on the toy’s surface.
- A foul odor is coming from the toy, indicating bacteria growth.
- Your child has been sick, which necessitates disinfecting their toys.
Regular cleaning prevents the majority of bacteria and mold from taking hold, but deep cleaning ensures a higher level of sanitation. Combining both practices will help you effectively sanitize bath toys and safeguard your child’s health.
How to Prevent Mold and Bacteria Growth
Preventing mold and bacteria in bath toys is better than fighting it. Here are tips to keep toys clean and safe.
- Dry Toys After Use: Make sure to drain all water from toys after the bath. Pat them dry with a towel or let them air dry completely before storing.
- Close Squeeze Holes: Seal the holes in squeeze toys with hot glue or silicone. This stops water from getting inside and prevents mold growth.
- Use Mesh Bags for Drying: Hang bath toys in a mesh bag after use. This allows air to circulate and dries toys faster.
- Clean the Bath Regularly: A clean bath means cleaner toys. Scrub the bath weekly to stop mold from transferring to toys.
- Control Humidity: Keep your bathroom well ventilated. Use an exhaust fan or open a window to reduce moisture.
- Rotate Toys: Limit the number of toys in the bath. Rotate them to give time for thorough drying and cleaning.
Following these steps will help ensure that mold and bacteria don’t have a chance to grow. Incorporate these practices into your regular cleaning routine to maintain a healthy play area for your child.
Safely Storing Bath Toys to Minimize Germs
After learning how to sanitize bath toys effectively, it’s equally important to store them properly. Safe storage minimizes the risk of germ accumulation, keeping your children’s bath toys in top hygienic condition. Here are straightforward tips for safely storing bath toys to ensure they remain clean and dry between uses.
- Use a Toy Net or Hanging Organizer: These storage solutions allow for air circulation. This ventilation helps bath toys dry faster, reducing moisture that breeds germs.
- Choose a Soap Dish with Drainage: If you have only a few toys, you can place them on a soap dish. Make sure it has holes or slits to let water drain away.
- Avoid Closed Containers: It may seem practical to toss all the toys into a plastic bin. But without airflow, these containers can become breeding grounds for mold and bacteria. Opt for open baskets or bins with holes.
- Regularly Wash Storage Accessories: Just as toys need cleaning, so do the containers or nets they’re stored in. Wash these regularly to prevent mold and bacteria transfer to the toys.
- Keep Storage Areas Dry: If your bathroom remains damp, consider moving toy storage outside. A shelf or cabinet in a drier area can be a better alternative.
- Dry toys before storing: Ensure all toys are fully dry before putting them away. This might mean air-drying overnight or using a towel to help soak up the moisture.
Following these storage tips will help extend the life of bath toys. It keeps germs at bay, contributing to a healthier bath environment for your kids. Remember, proper storage is just as crucial as regular cleaning in how to sanitize bath toys.
When to Replace Bath Toys
Knowing when to replace bath toys is key to ensuring safety and hygiene. Here are signs that indicate it’s time for new toys:
- Persistent Mold: If mold keeps coming back despite regular cleaning, replace the toy.
- Damage or Wear: Cracks or breaks can trap bacteria. Throw away damaged toys.
- Fading Colors: When the colors fade significantly, the material may be degrading.
- Outgrown Toys: As kids grow, they may outgrow certain bath toys. Update the toy collection.
- Safety Recalls: Stay informed about recalls. Discard any toys that are flagged for safety issues.
It’s better to be safe than sorry. When in doubt, replacing a bath toy can prevent potential health risks. Make it a habit to inspect toys regularly. This way, you can spot issues early and take action.
Remember, bath time should be safe and fun. Keeping up with when and how to sanitize bath toys, along with knowing when to replace them, helps maintain a healthy environment for your child.